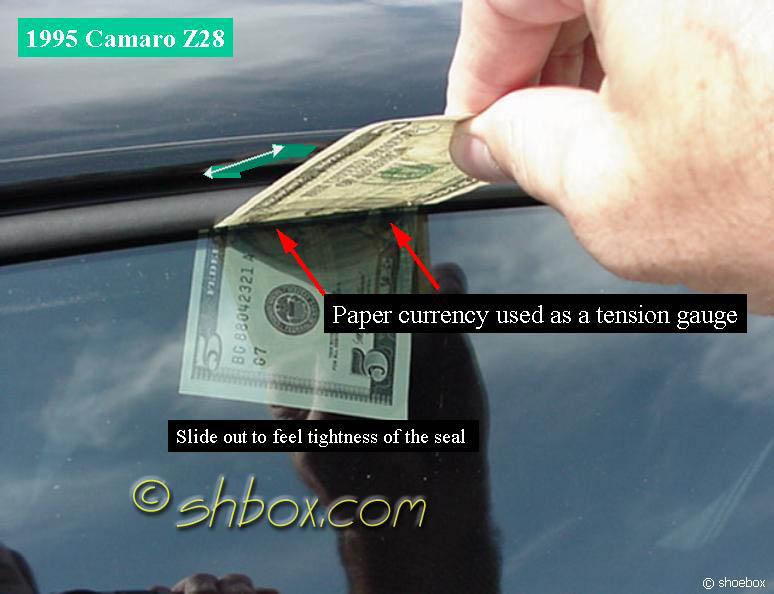
This is the way I like to gauge the tension and seal of the window to the weatherstrip:
- Place window in the full UP position.
- Place a piece of paper currency between the window and weatherstrip.
- Hold the bill and close the door/window on it.
- Test the tension by pulling the bill straight out at 90ş from the window. If you have a good sealing window, you can try it on that one first to give you an idea of how much drag makes a good seal.
- If the bill slips out easily, you will have wind noise and probably water leaks. A decent seal has a fair amount of tension as you pull the bill out.
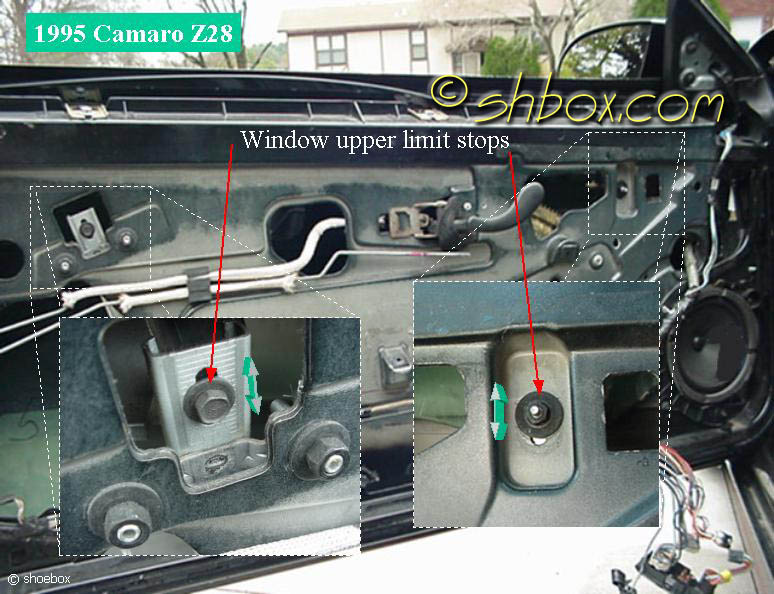
- Loosen the nut or bolt shown just enough to allow up or down movement.
- Notice that there are small gradient lines on the door panel at many of the adjusters. This lets you judge how far you move. If you like, you can make a mark at the original location before you start moving anything. This will give you a baseline to go from in case you get too far off.
- Make your adjustment to the upper limit stop.
- Tighten the front nut or rear bolt/screw to 89 lb. in.
- Check alignment or tension.
- Lower the window part way and then raise back to within an inch of the weatherstrip at the roof. This will allow window movement and still let you see if it is parallel to the upper weatherstrip.
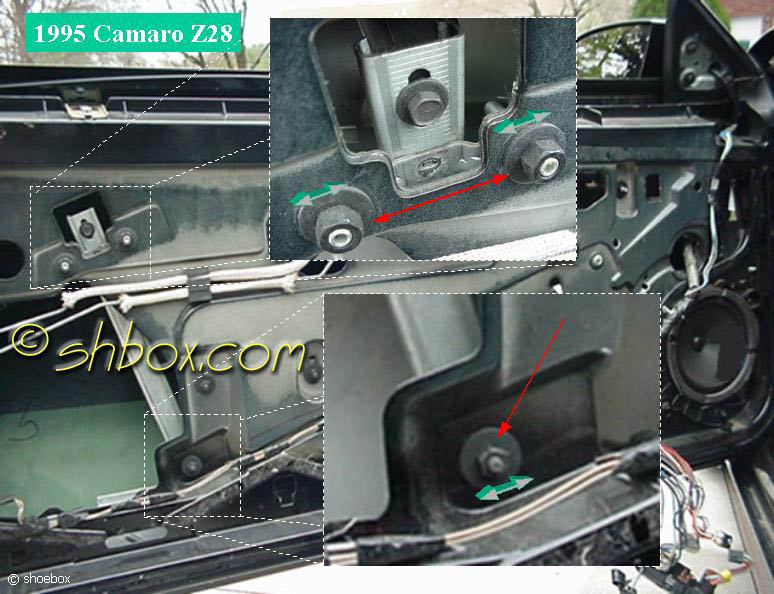
- Loosen the nuts shown just enough to allow up or down movement.
- Make your adjustment.
- Tighten the nuts to 89 lb. in.
- Check alignment.

- Loosen the nuts shown on the top and bottom of the rear channel.
- Move the channel forward or rearward as needed.
- Tighten the upper nuts to 20 lb. ft. and the lower nut to 89 lb. in.
- Check alignment.
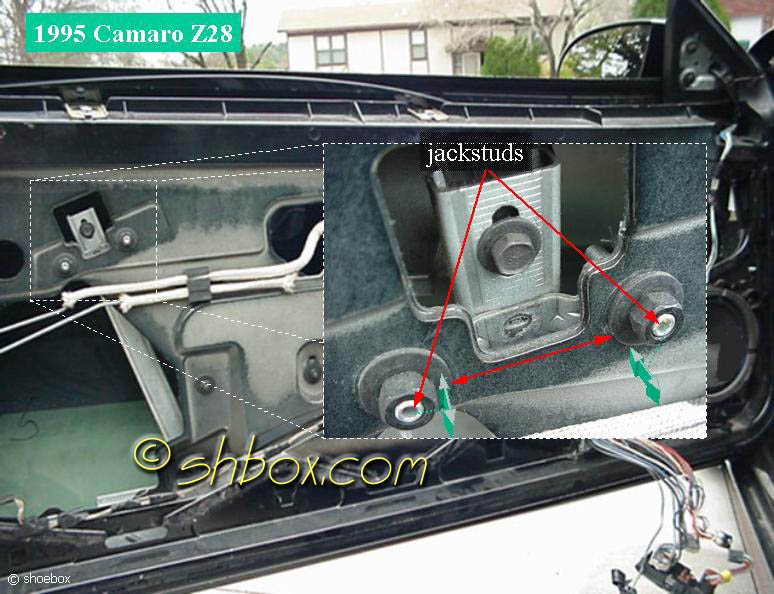
- Loosen the nuts shown in the center of the door.
- Move the jackstuds in or out using an allen wrench.
- Tighten the nuts to 20 lb. ft. making sure the jackstuds do not turn (like securing poly locks on your rockers arms :-) ).
- Check seal/tension.
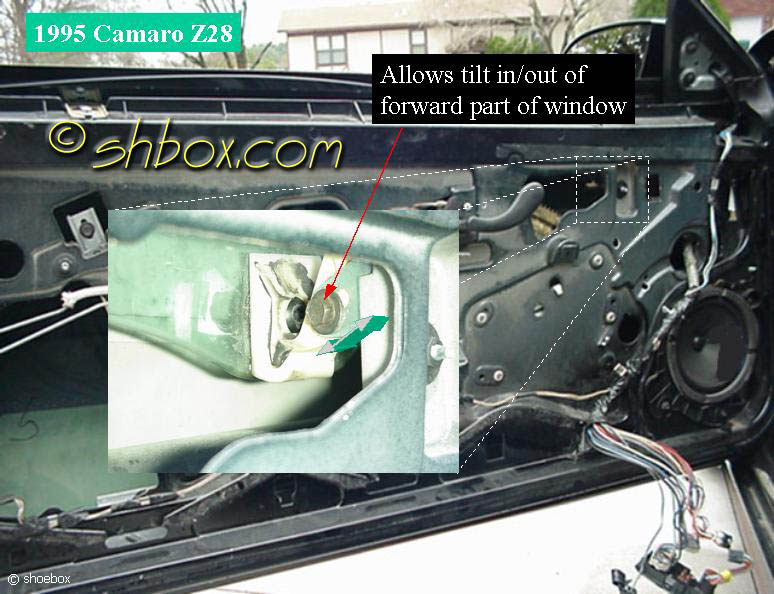
- Loosen the bolt/screw shown on the inside of the front support assembly.
- Adjust the stop angle as required. Note: you might have to re-adjust the upper limit stop again.
- Tighten the bolt/screw to 62 lb. in.
- Check seal/tension.
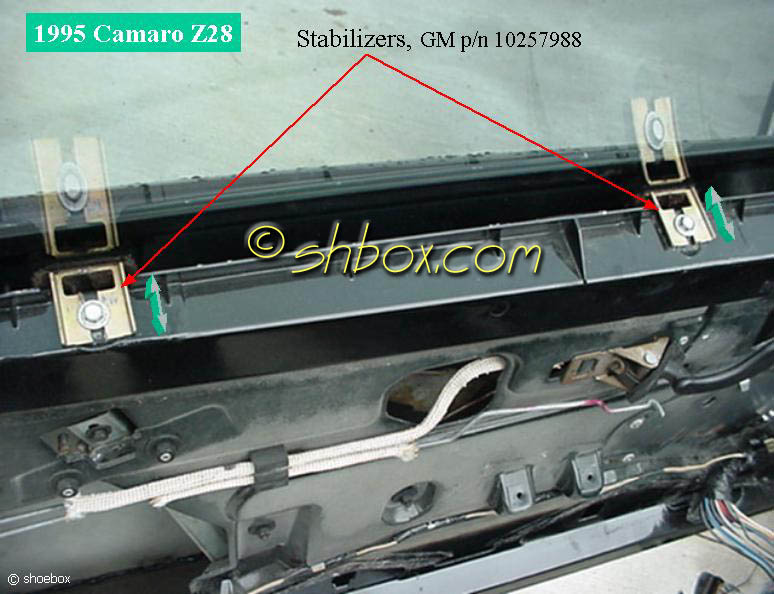
- Raise window to full closed position.
- Loosen bolts/screws.
- Apply slight pressure outboard on window near bottom.
- Move stabilizer assemblies up against the window, keeping them parallel to the glass.
- Tighten bolts/screws to 89 lb. in.
- Inspect window operation and stability
- If window binds, move stabilizer assemblies inboard slightly.
- If window is unstable, move stabilizer assemblies outboard.
- If stabilizer assemblies have been adjusted and window squeaks while returning to up position, lubricate outside rearview mirror appliqué window channel.
- If window binds, move stabilizer assemblies inboard slightly.
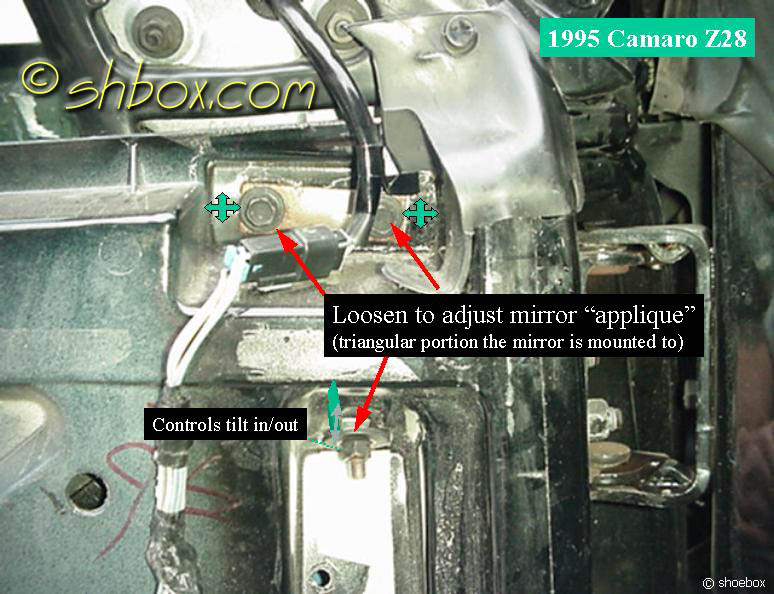
- Loosen the bolts/screws and nut shown on the inside of the front support assembly.
- Adjust the appliqué as required.
- Tighten the bolts/screws and nut to 53 lb. in.
- Check alignment/seal/tension.